I have been sewing for over 50 years.
While majoring in Textiles and Clothing at NDSU
I met this dear friend.
We took every Clothing Construction class together.
Thanks for being an awesome lab partner, Debra.
Our daughter has a project in the works,
she is making pillow covers.
She lives on the east coast, and I live in the Dakotas,
so I was helping her last night on FaceTime.
Since pictures are worth a thousand words,
I decided to construct a zipper sample today...
(Hopefully this helps a little)
Measure your zipper from the pull tab to the zipper stop.
This is a 7" zipper.
Also check the width of your zipper.
If you have an oversized zipper, you will want the seam allowance
to be wide enough to accomodate your zipper's width.
Reinforce the end of your seam,
then change the stitch length to baste the zipper opening area.
Press the seam allowance open and flat.
Postition the zipper face down over the basting,
checking frequently to make sure it is centered over the seam.
Pin in place...
make sure the pull tab is up.
With a contrasting colored thread,
by hand, stitch the zipper in place.
This is an important step.
In the past, I have thought I could save time by skipping this hand sewing,
but I would always end up taking my zipper out and starting over.
Take long hand stitches on the far outer edge of the zipper tape.
These can be long stitches and don't have to be perfect,
as they will be removed.
Make sure to sew close to the edge and double check to
make sure you are also catching the fabric seam allowance.
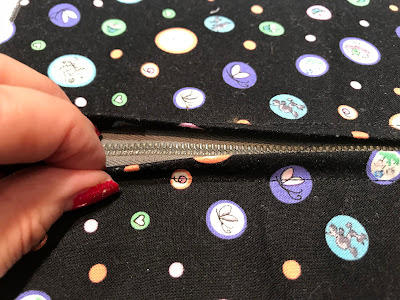
It should now look like this.
Now, without the pins the zipper is flat and secure.
Plus there is a guide so you can do the topstitching
from the right side of your fabric.
I am going to topstitch a scant 3/8 inch from the center.
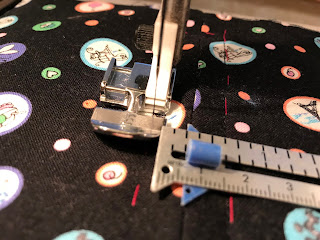
Using my zipper foot, and seam gauge as a guide,
I machine sew, with matching thread around the zipper.
Start at the top of the zipper.
At the bottom, pivot and count the number of stitches to the center.
Then count again, so you know when to pivot to go up the other sice.
Stitch up the other side.
My machine sewing is on or close to the hand stitches.
Those red handstitches allowed me to sew from the outside
and make sure my sewing was straight.
But, also gave me the confidence that
I would not sew off the edge of the zipper tape underneath.
With your seam ripper, remove the contrasting hand basting,
and the machine basting in the zipper opening.
The finished centered zipper.
Lucy thinks that this was the most boring blog post...ever!
Take care,
~Natalie


No comments:
Post a Comment